Using EasyCalendar, you can manually Create Events to manage your meetings, appointments, etc. And, share a link that brings people to your EasyCalendar page.

Steps to Manually Create Events
Manually Create Events using EasyCalender can be ensured in the following steps:
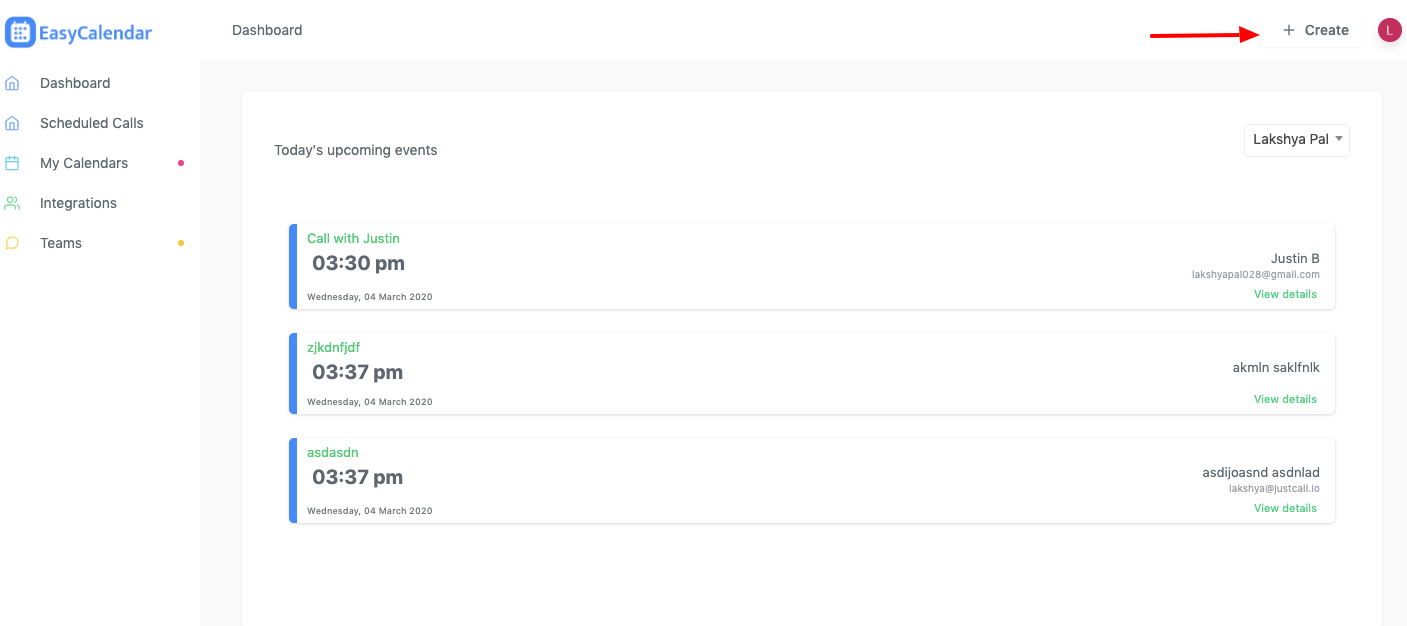
- You will get this option on the top right corner of the Dashboard page.
- Click on ‘Create’ and add new events to your calendar.
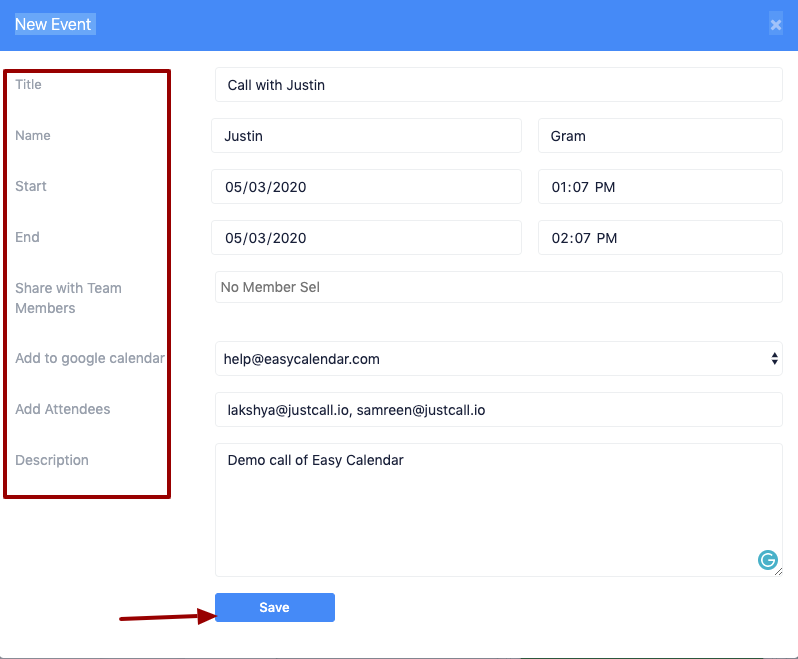
- You will get the page where you need to manually fill the details in order to schedule an event.
Fields available while creating event
Title
Assign a title to your event. This will be visible in your Google calendar.
Name
Enter the name of customer with whom you want to set an appointment. This will include the first and last name.
Start and End Date
You can book the timing of the slot.
Share with Team Members
You can share the appointment with your team members. Moreover, these members will be added as ‘Attendees’.
Add to google calendar
Select the Google calendar on which you wish to see the booking.
Add Attendees
Multiple persons can be added as an attendee. This field will include the email domains of persons.
Description
You can add the details of the appointment in this block.

Update/Reschedule the fields
Most importantly, you can edit all the fields which you have created at an event.
Edit fields from Scheduled Calls section. Click on the particular appointment and edit the fields as per need.
If you have any queries or questions, feel free to ping us at: help@easycalendar.com
